Sourdough Starters for Beginners

The purpose of this blog is to give you a quick down & dirty about Sourdough. Once you have a better understanding of sourdough, it will be easier for you to cook with and learn more!

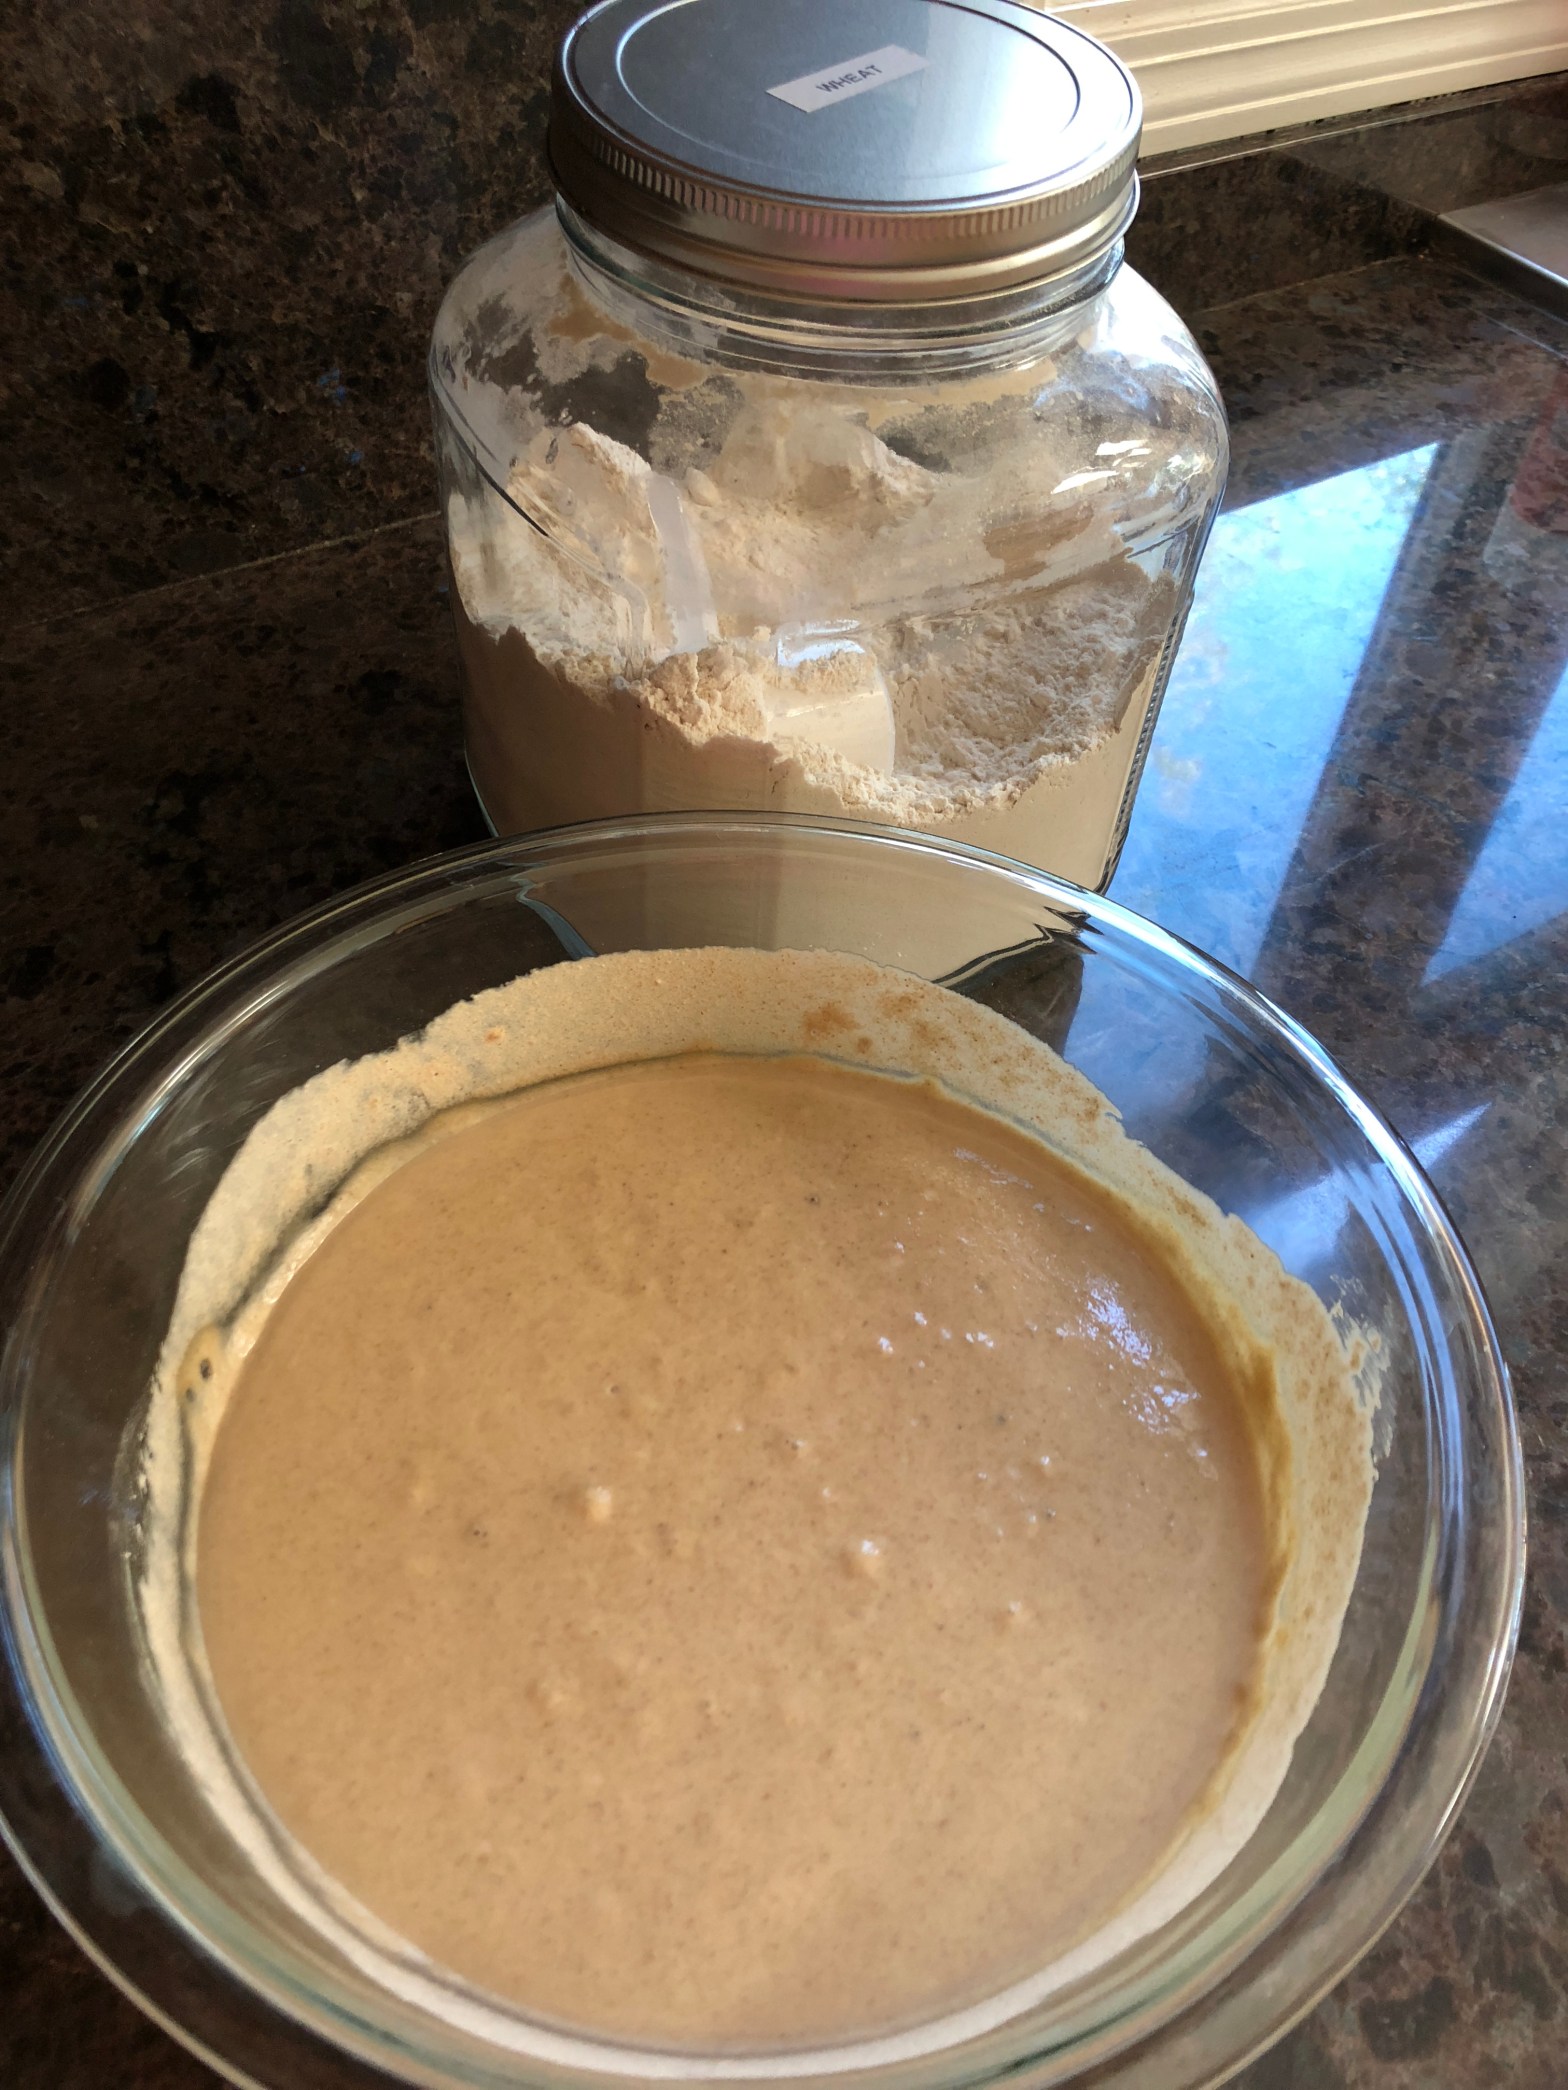
  • A Sourdough Starter is the name for the beginning of of a sourdough recipe. It is a fermented flour and water mixture.
  • Sourdough starters are like pets. You have to feed and water them daily (or store them in the fridge and feed them weekly- more on this soon!)
  • Sourdough starters are fed equal parts water and flour daily (such a 1/4c flour and 1/4 c water)
  • For its first week, transfer it to a clean bowl every day or so. Then after its established, you can change the bowl weekly.
  • Don’t cover with a tight lid, the sourdough needs some room to breath. Cover it with a light cotton towel or paper towel- store it on the kitchen counter
  • Stir it at least once a day- when you feed it. Stirring it twice a day is good but not completely necessary
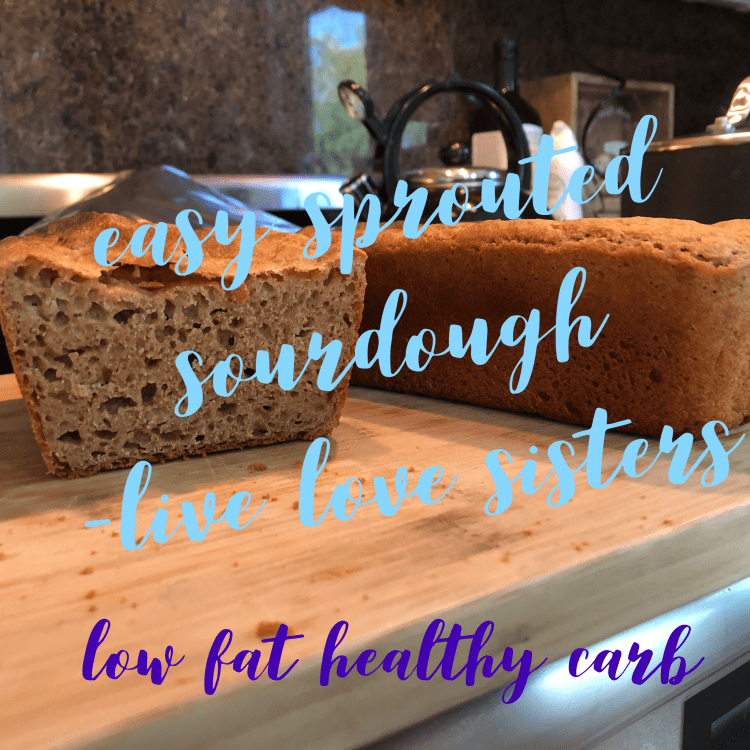
  • Many people use white flour for sourdough starters, this does make a fluffy loaf of bread, but it is not a Trim Healthy Mama on-plan ingredient. Wheat, Rye and Spelt are healthy options.
  • The water you use for your sourdough starter should not be chlorinated city water- spring water, or well water is best
  • The bowl you keep your sourdough in should be glass or plastic, metal kills your natural yeast. Also, don’t stir it with a metal spoon, use a wooden or plastic spoon to stir!
  • Sourdough starters “catch” wild yeasts in the air, you do not add packaged yeast to them
  • Sourdough starters take 7-10 days to mature enough to use them. Once they smell like beer and are bubbly, you may use it! Then replenish whats left by feeding it daily until you are ready to use it again
  • If you need to take a break from your starter, put it in the fridge and slow down its growth. Feed it weekly instead. Pull it out and resume daily feedings when you are going to use it.
  • If it molds, its garbage and start over. But many starters can last for years… if you do it right!
  • If it has a black liquid on the top, its called “hooch” and its a sign that your starter may need more food. Just pour it off, and feed it. If some of it gets stirred in, thats okay, no need to be picky!
  • Start looking for recipes to use it in! Bread is just the beginning, you can make waffles, pancakes and other baked goods! Have you seen our first sourdough recipe? Its an easy bread you can make in your bread maker, or oven!
    Stay tuned for more sourdough recipes!

    ← Back

    Thank you for your response. ✨

Easy Sprouted Sourdough – THM E

Both Sourdough and Sprouted breads have a lesser impact on your glycemic index, than otherwise processed flours. This is because the sprouted flour is more like a vegetable than a grain, and the fermentation of the sourdough partially breaks down the flour.

This recipe is Low Fat and Moderate in Healthy Carbs. It is THM E compatible. 

But. Sourdough takes time. It takes 7-10 days to get a starter to ferment, and then takes hours to rise before it can be baked. This intimidates a lot of folks away from making sourdough breads!  This recipe is the easiest sourdough we’ve ever made, because its only half sourdough, and half sprouted grains.

Because only half of the dough is fermented, it has a sourdough taste that is light, and definitely not overpowering. Because its half sprouted flour, it requires yeast, which is why it is not a true sourdough bread. It also requires a tablespoon of honey to grow the yeast. Don’t worry, this tablespoon of honey will not cause your blood sugar to spike, as its divided between a large loaf of bread.

IMG_3072

Some of us like to use a bread maker simply for the dough process, and then switch to conventional baking in pans. This is totally do-able if thats how you like to bake! See the modification at the end of the recipe for this method.

Heres the link for the printable PDF recipe! Easy Sprouted Sourdough Bread—Bread maker

This bread is also easily frozen. Its best to let it cool, slice it, then freeze it. Thanks for coming back to our site! Give us your thoughts!

← Back

Thank you for your response. ✨

First Week Bingo Shopping List! THM friendly

So it’s your first week on Trim Healthy Mama, or Low Glycemic Impact, are you feeling overwhelmed? Don’t worry, you aren’t alone. Stick with it though, because its all going to click! We’ve been there, and remember how much we needed the help of each other out!

We posted a Beginners Bingo card to help newbies embrace this lifestyle and jump in with both feet. Now we created the companion to that post, the shopping list!

This No Special Ingredients, No Long Recipes and No Fuss List of foods you can find at your local grocery store will help you get the start you needed without leaving you overwhelmed.

Find the shopping list here- it’s a Printable PDF! Beginners Bingo Shopping List

The best part about this plan is how customizable it is! We made this easy list in order to help you find your balance in this lifestyle. So if you don’t like an item (say, mushrooms) don’t buy them! On the other hand, if you absolutely LOVE cucumbers, buy a couple of them!

There are only a few times that you need to limit yourself in the foods that you eat, as long as you are pairing them correctly. However, some calorie dense foods, you wont want to over-do, but thats for another day! In general, the foods on this beginners bingo card are not going to get you into trouble abusing calories.

Stay tuned for upcoming recipes, tips and more from us! And we’d love to hear from you!

Stay Encouraged!

← Back

Thank you for your response. ✨

Beginners Bingo! Trim Healthy Mama, Low Glycemic Impact

Low Glycemic Impact eating means choosing to pair your foods in a way that minimally impacts your blood sugars. “Glycemic” is just a way to say, blood sugar levels. This concept aligns with the Trim Healthy Mama way! There are many books and resources out there, that describe different ways to arrange your meals. Our pick: Trim Healthy Mama, the plan which you can buy here! 

But the common theme, is to separate carbs and fats so that your body doesn’t have to chose to store either the carbs or the fats. See, unless you have a high metabolism like growing kids or super-star athletes, your body can only handle so much “glycemic load” or amount of calories/fats/carbs that it has to choose how to burn. By separating these food groups, your body doesn’t have to choose what to store since you are only providing enough food to burn.

When you jump into a new lifestyle, its easy to get overwhelmed. Its not a big deal if you want to take it slow and adjust your meals as you go. But some of us (myself included!) are all-or-nothing mentality! And we feel like we have to start 100% on day one without cheating! This guide was made to get your journey started, while you start reading and learning!

This guide is all about easy. Its no special ingredients, no long recipes and no fuss.

There’s way more here than this little picture shows- Check out the printable PDF here: Beginners Bingo

We’ve also got a short and simple guide to how the plan works underneath the bingo card! Use this bingo card to pick and choose your fuels throughout the day, no need to stick in one column. As a reminder- separate your fuels by 3-4 hours!

Coming soon- a shopping list for your first week!

Let us know what you’d like to see from us next!

← Back

Thank you for your response. ✨

Peanutty Protein Veggie Dip – THM FP

Our First Recipe!
For our first recipe, we went with something simple and delicious!! This quick and easy snack is protein packed, low calorie, low carb and low fat! Its quick and filling! This recipe can be used in low fat, low calorie, low carb diets, its a Keto and THM FP compatible recipe.

IMG_3069.PNG

This recipe could easily be dressed up with a couple optional add-ins but its great as-is! Check out our optional add-ins below the recipe!

IMG_2783

Peanutty Protein Veggie Dip

Ingredients:

2 Tbsp. Peanut Flour, defatted

2 Tbsp. Plain Greek yogurt, non-fat

2 truvia packets

1/2 tsp vanilla extract

1/2 tsp cinnamon

Note: you can also use pure stevia powder, the measurement would be 2/32 of a tsp! Very small amount!

Optional add-ins: rev up your metabolism by adding 1 Tbsp MCT oil which makes it low carb but not low fat. You can also add a Tbsp of Lily’s chocolate chips, which also makes it low carb, but not low fat.

This recipe is awesome with carrots or apples (if you wish to eat some healthy carbs), or stick with non-starchy veggies like celery for a low carb snack!

Check out the nutritional info!

Screen Shot 2018-09-21 at 2.45.48 PM.png

Thanks for checking us out!

We’d love your thoughts, suggestions and questions!

-Laura and Leslie

Live. Love. Sisters.

← Back

Thank you for your response. ✨


The Start of our Blogging Journey

We are two sisters, with a passion for cooking, baking and homemaking! We collaborate together on a daily basis about meals, ingredients, health, wellness and more. We both follow blogs and love the sharing that takes place on blogs! On our journey for healthy lifestyles, we have found success with low glycemic impact eating (the Trim Healthy Mama way!) and focus our recipes on this concept! We wanted to share our journey and experiences with all of you.

Thanks for joining us!

Live Love Sisters!
Sisters Laura and Leslie collaborate in this blog about cooking, baking and homemaking

Good company in a journey makes the way seem shorter. — Izaak Walton