Cinnamon Swirl Sourdough

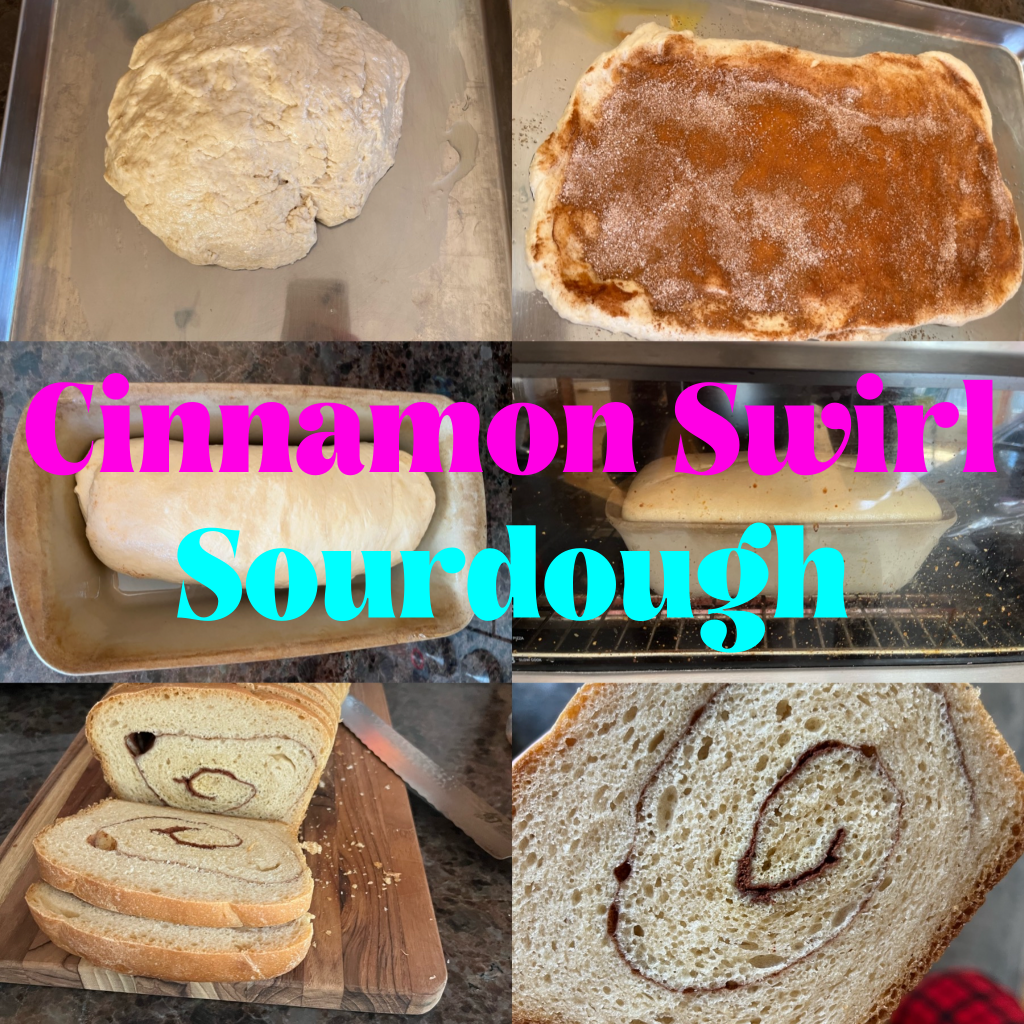
I love sourdough. Earlier this year I decided I would not buy bread from the grocery store anymore and it has allowed me to branch out into my sourdough baking quite a bit! just for fun I wanted to make a cinnamon swirl bread and it turned out so great I’ve been making it pretty regularly!

Ingredients

1/2c sourdough starter

2 c white whole wheat

1 1/2 c all purpose flour

1 1/2 c warm water

1Tbsp honey

1tsp salt

Olive oil for your hands

Cinnamon and sugar- or sugar substitute for the cinnamon layer

For cinnamon mixture set aside 1-2Tbsp pyure stevia blend, or sugar if that’s what you prefer and 1-2Tbsp ground cinnamon -mixed

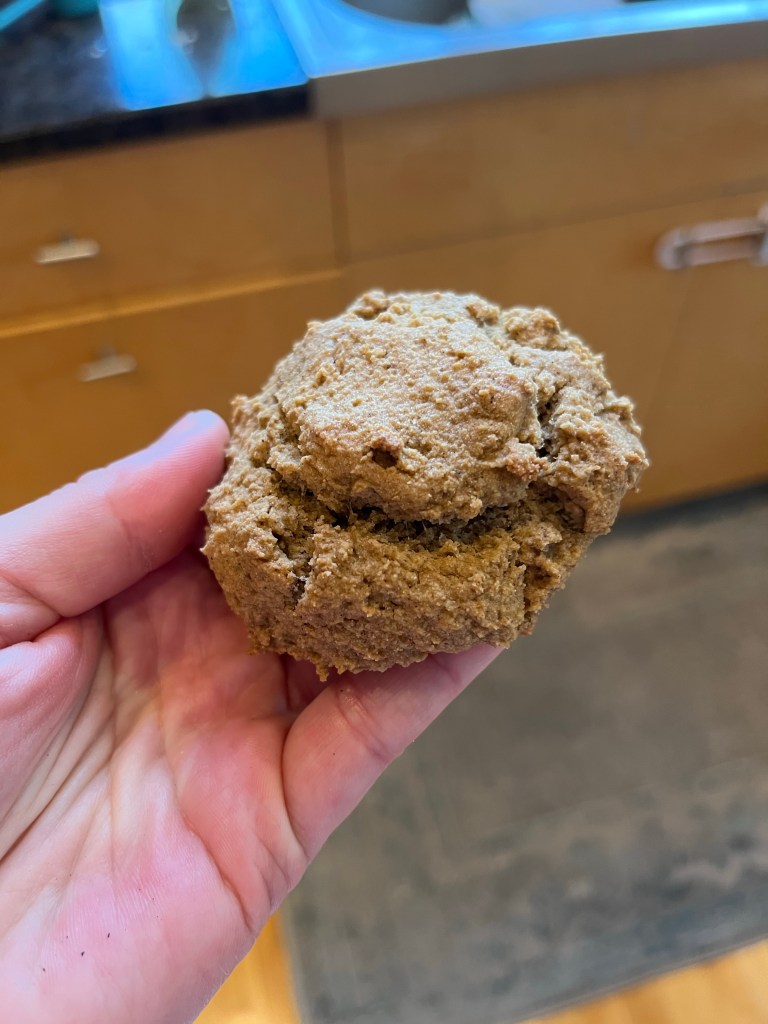
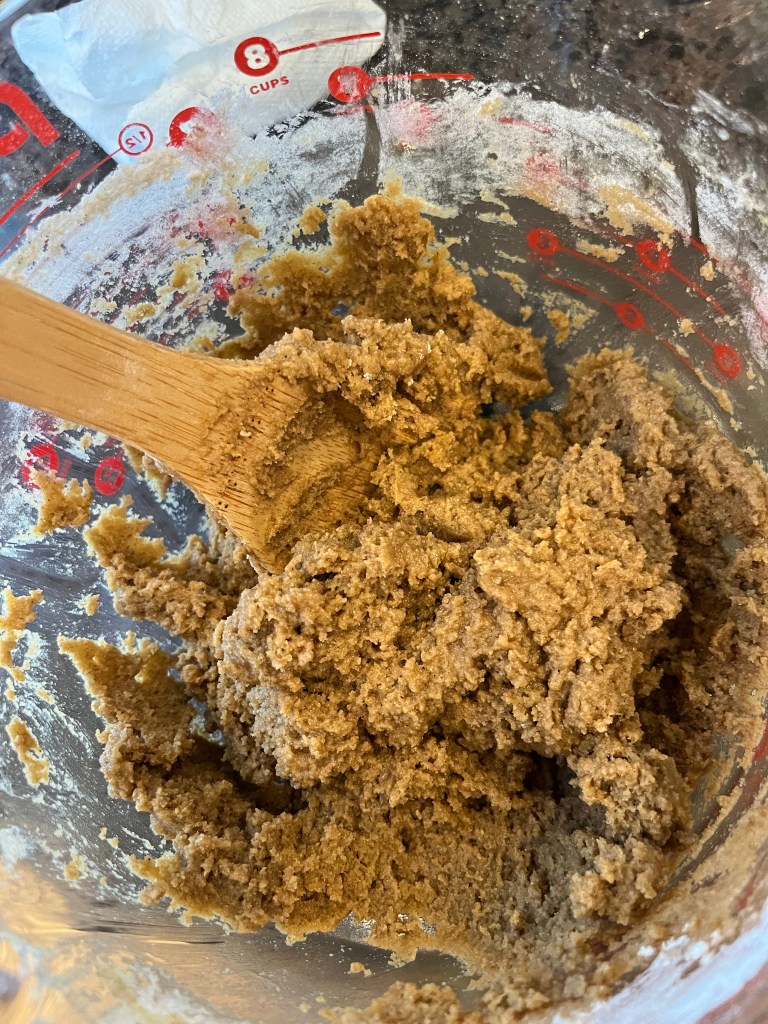
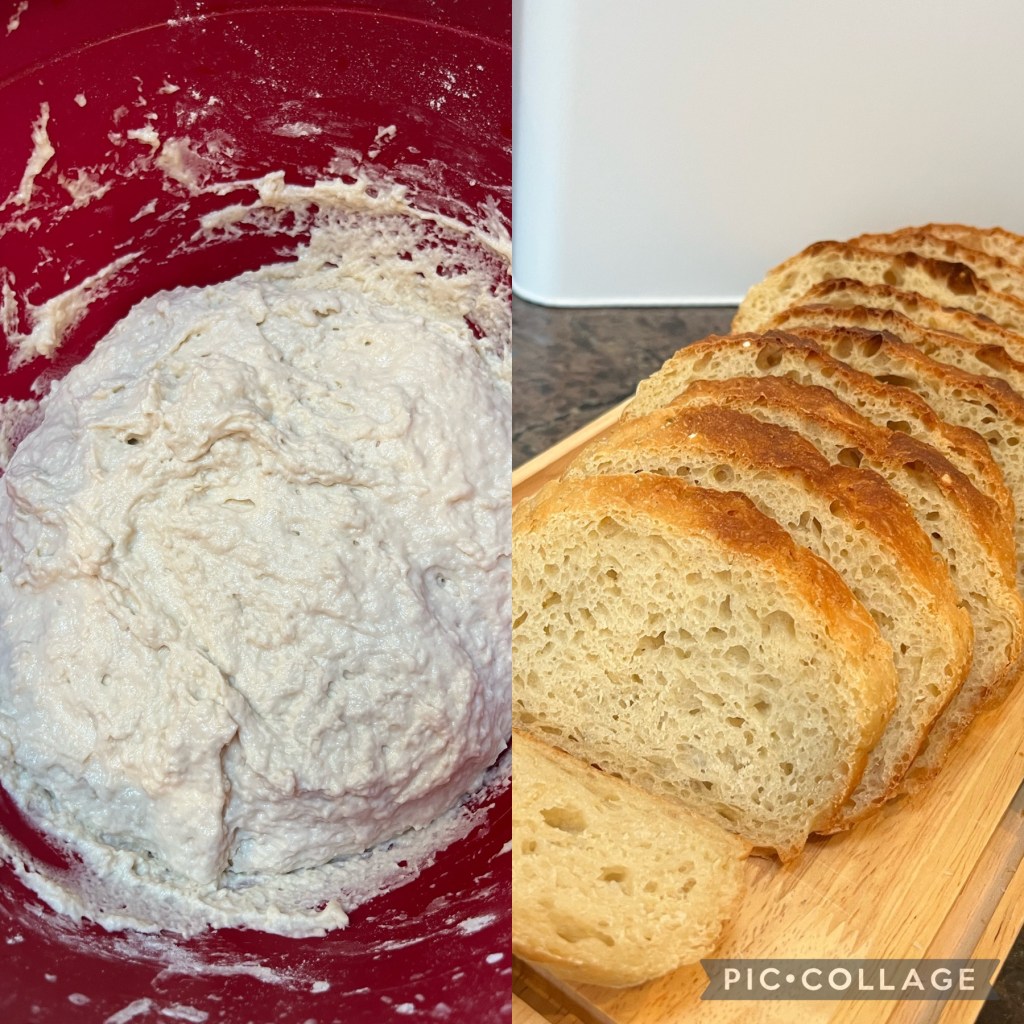
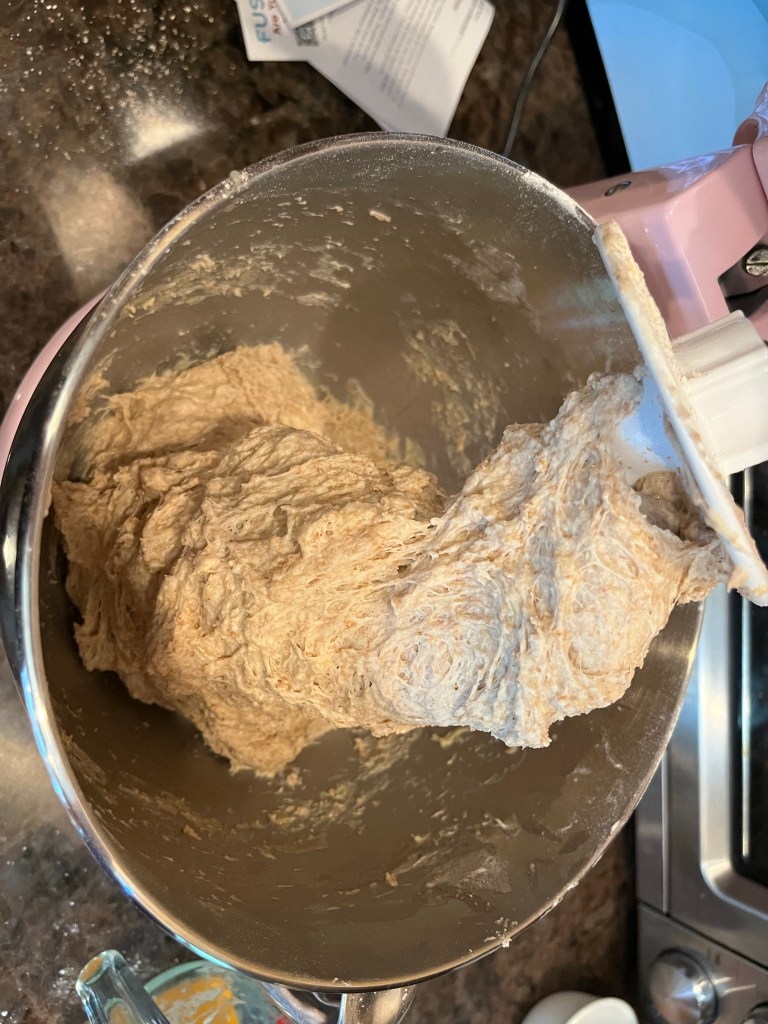
First put the sourdough starter, flour, honey, water, salt all in your mixer and need it into a shaggy dough for 2-3 minutes

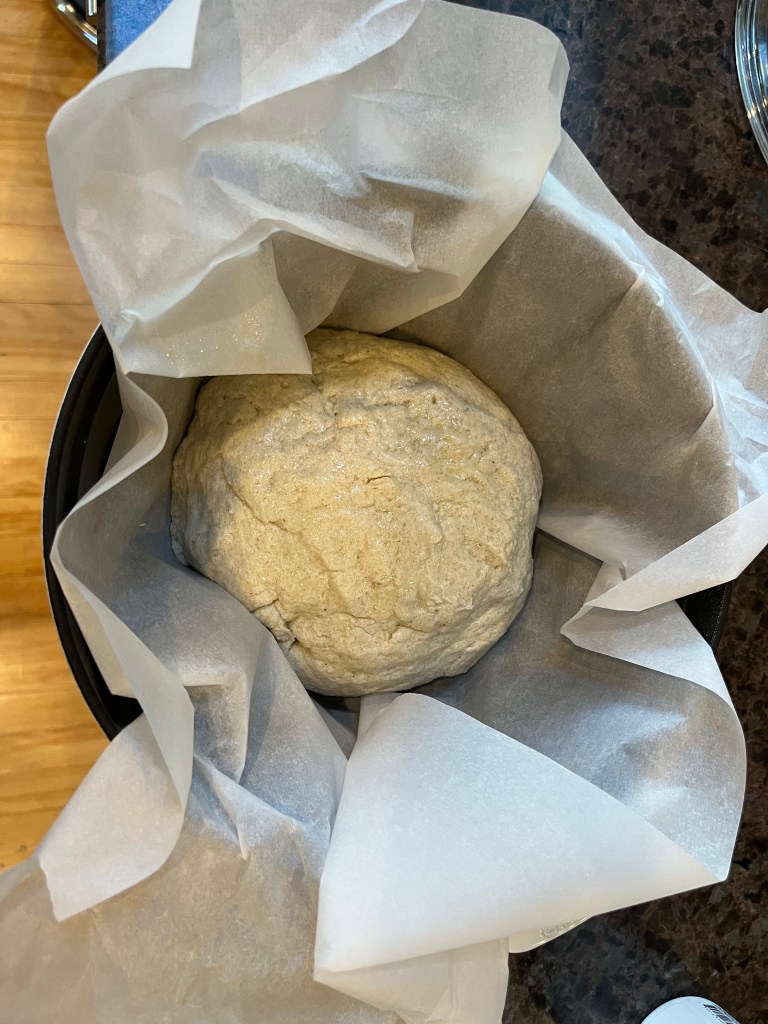
Flop the sticky dough onto a cookie sheet that has been prepared with some olive oil spray. Put a bit of olive oil on your hands and spread it over the top of the dough to hold the moisture in. Then cover the dough with plastic wrap and let it sit on the counter for 7-12 hours.

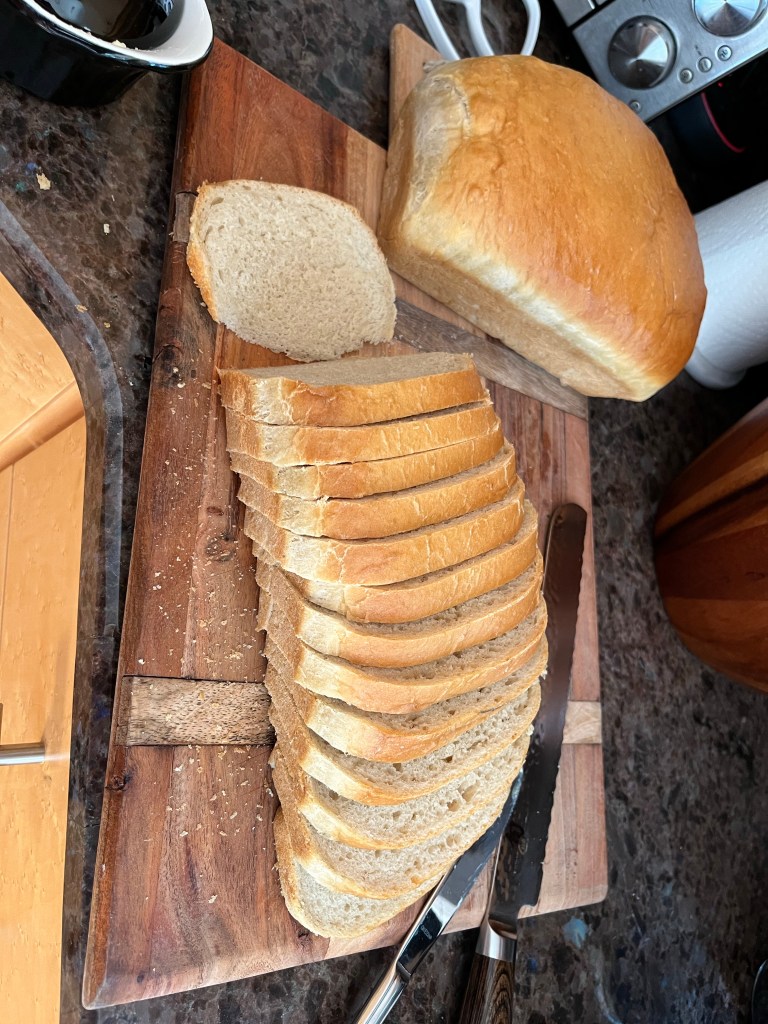
When you come back to the Dell, uncover it and prepare your hands with olive oil. Grab the dough and stretch and fold it three or four times. Then you can spread it out onto the cookie sheet and sprinkle the cinnamon and sugar mixture across the top. Once satisfied with your amount of cinnamon and sugar, roll the dough, as you would with cinnamon rolls, into a log and place it into a bread pan.

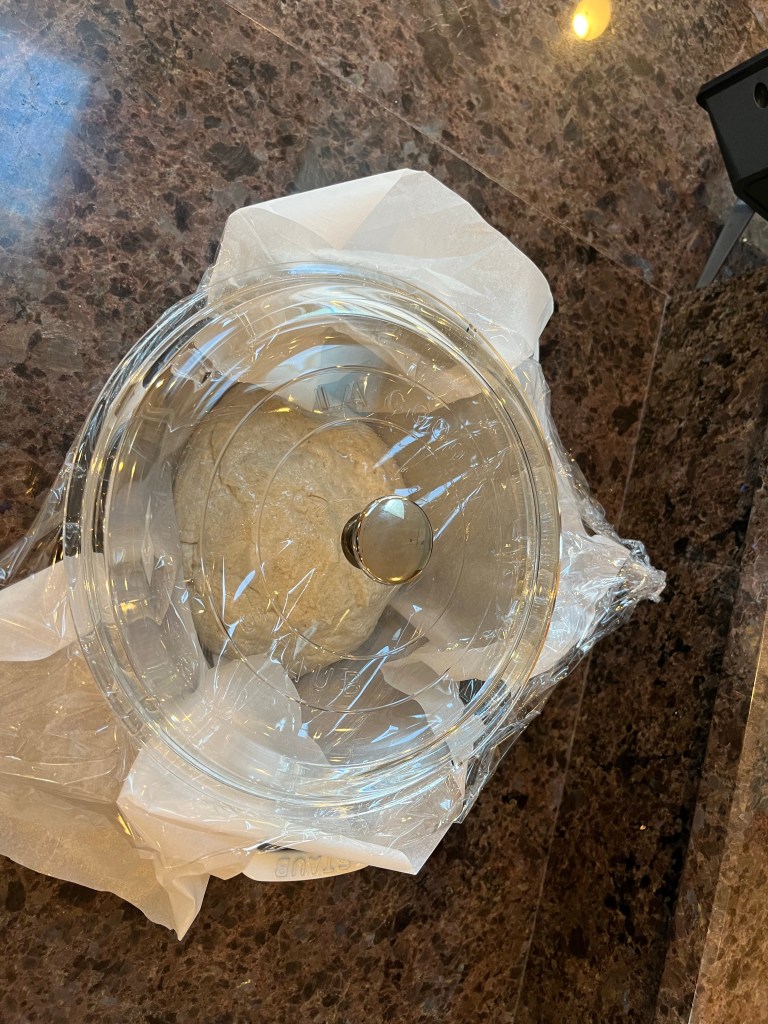
The dough will need a couple hours to rise. My kitchen is cold and it takes about 4 hours for sourdough to rise. You’ll want to cover it again so it doesn’t dry out! I use a damp tea towel or more plastic wrap.

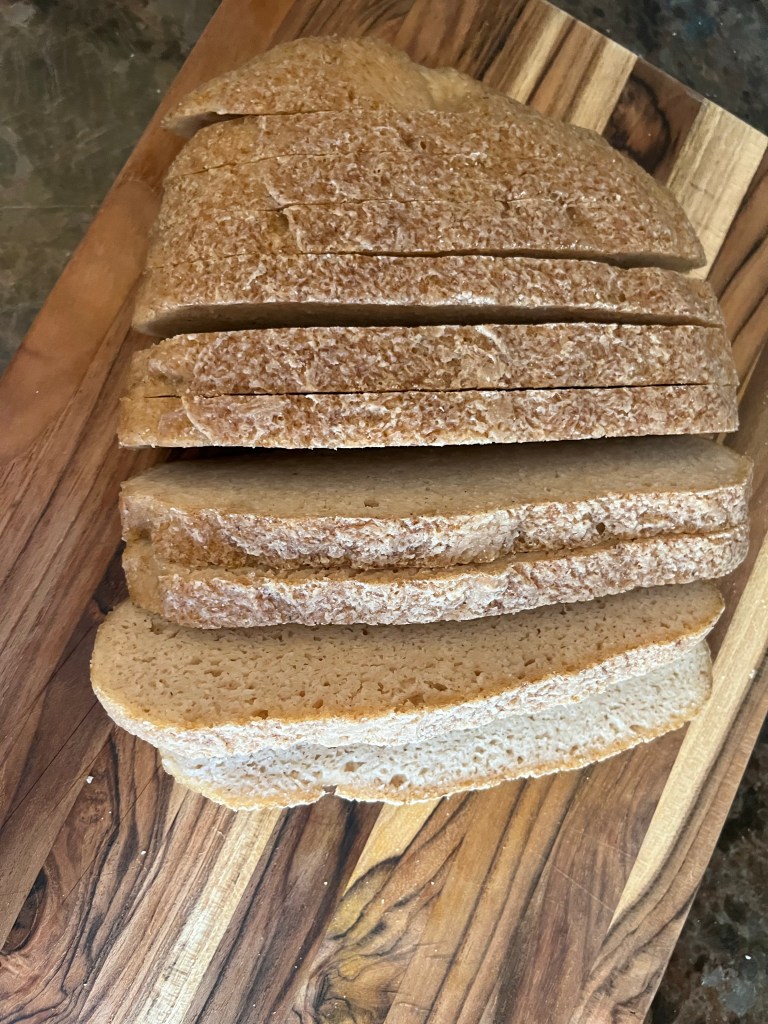
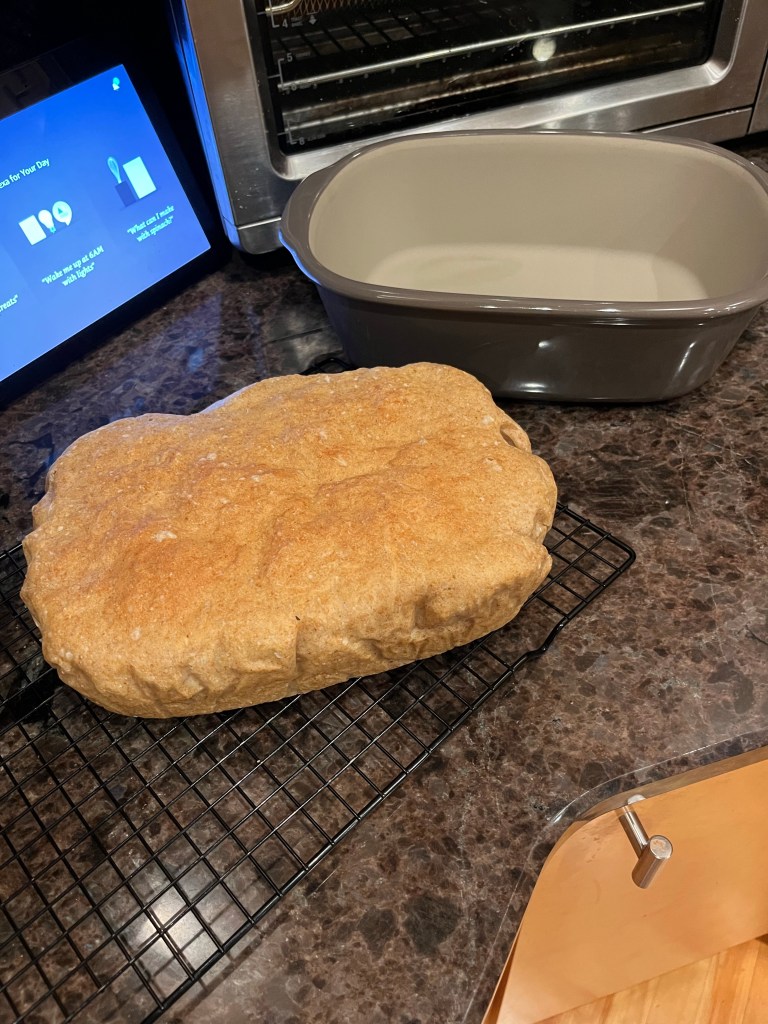
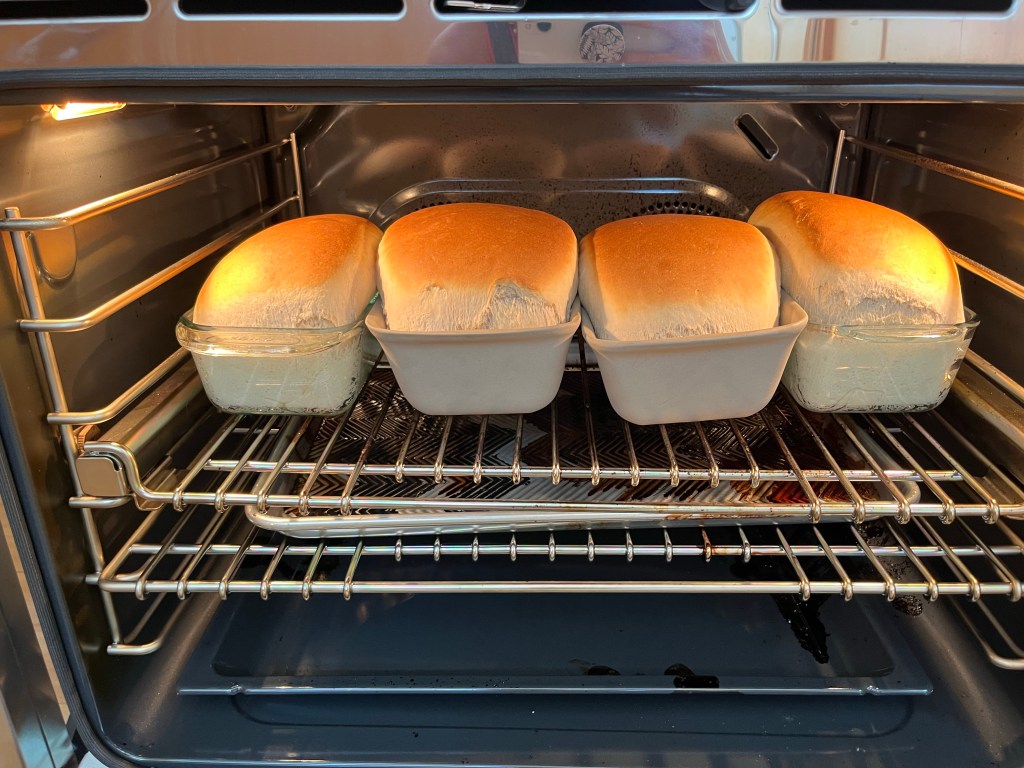
Once fully risen, bake at 350 for ten min. Then cover the top with tin foil to prevent it from getting too shark! And bake another 30 min.

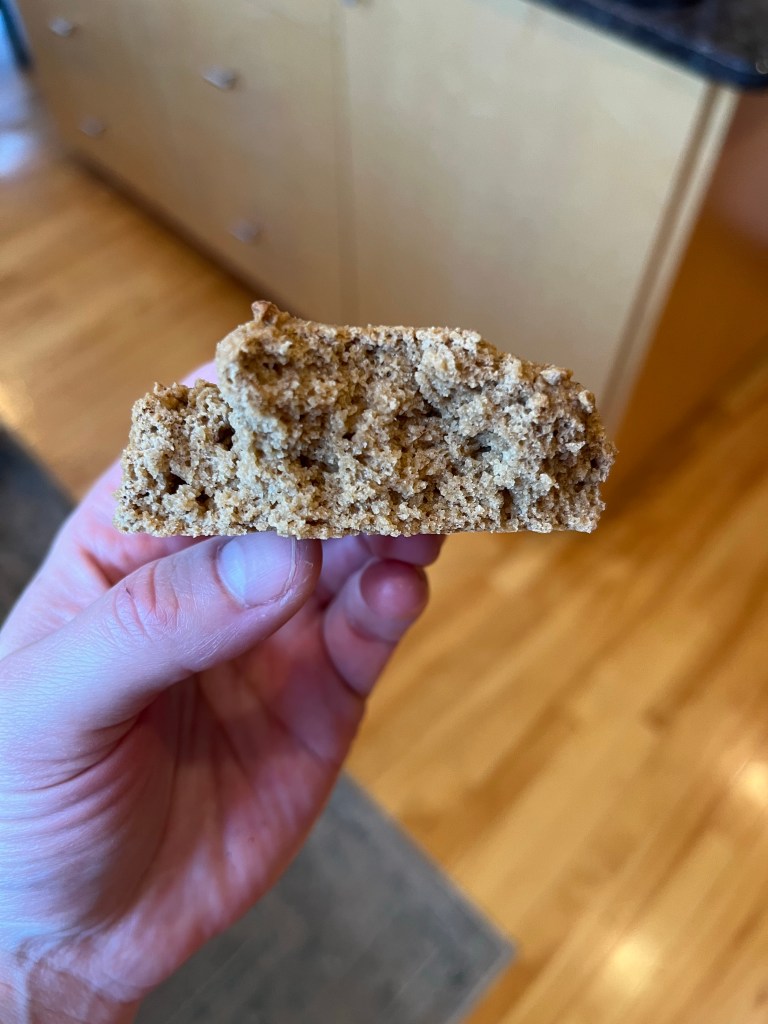
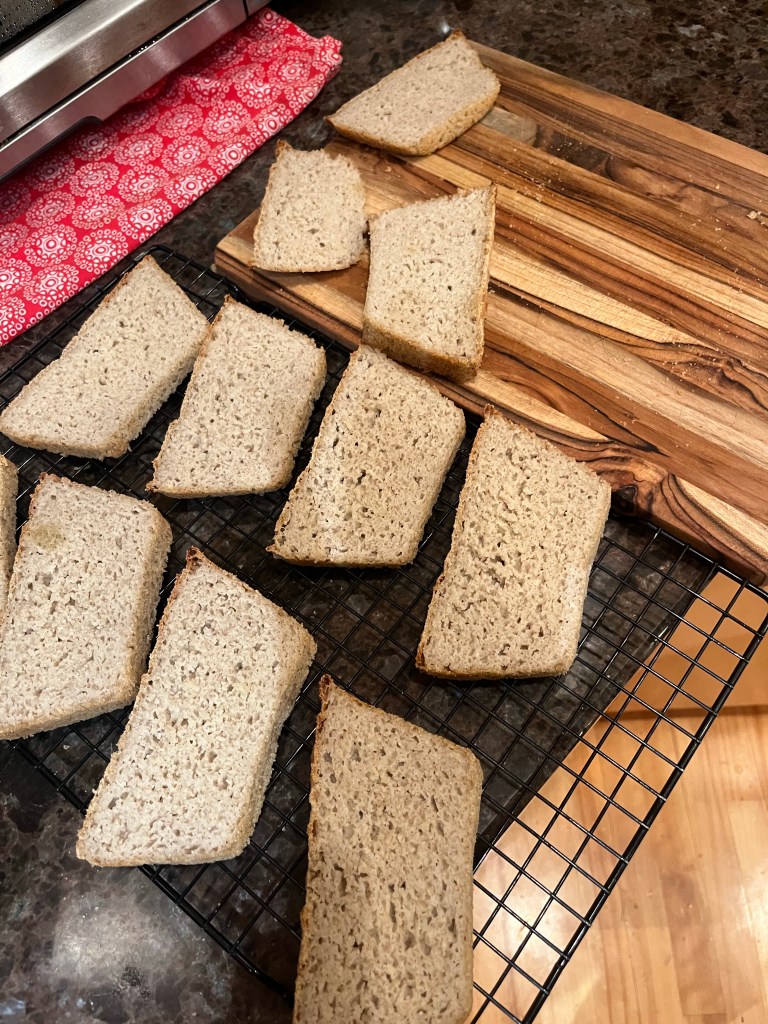
Allow to cool before slicing it!!

Chicken Turmeric Soup

Chicken turmeric soup 

This recipe was built out of the necessity to throw all the things on the stove and not tend to it until dinner time. It’s quickly become a family favorite!
I have not tested it in a crockpot, but I imagine you could put this recipe in a crockpot on low for a couple of hours until the chicken is cooked through and vegetables are tender.

6 chicken thighs- boneless and skinless 

6 carrots 

1 onion 

6 celery 

Optional 3-4 yellow potatoes, peeled and cubed 

2 quarts chicken broth 

2 cups water 

1tbsp garlic powder 

1/2 Tbsp black pepper 

2Tbsp turmeric

1 Tbsp mineral salt  

1 cup brown rice 

Dump all these ingredients into a large stock pot.  Let them simmer, covered for about an hour- until the chicken is cooked through, rice is tender and veggies are tender.  Pull the chicken out and shred it up, then toss it back! 

Sourdough Banana Pancakes -THM E

I love finding ways to incorporate my sourdough into meals in anyway I can! This recipe uses a little sourdough starter- which is a great way to start getting your kiddos used to the flavor of sourdough and fermented foods!

Mash 2 bananas

Whisk in 1 egg

Whisk in 1/4c of sourdough starter

Sprinkle about 1/2 tsp of cinnamon

Dash about 1/2 tsp of vanilla

Cook this up like pancakes in a skillet over medium. This makes about 10 small pancakes- which is perfect for my 3 littles. You could easily double for more kiddos or for yourself! My kids like them plain, the sweetness of the banana is enough for them! Peanut butter would be so tasty on top!

Gluten Free Sourdough Molasses Cookies

Recently I have been playing with gluten free baking for my husband who is gluten free. I love sourdough, so I made a gluten free sourdough starter with buckwheat flour and have been making tons of gluten free creations. I have really enjoyed it! Buckwheat has been the best gluten free substitute flour o have tried, I have found many of the commercial gf blends to be gummy or have a strange taste. Buckwheat really does taste like wheat, but it isn’t wheat!

In this recipe I use my gluten free sourdough starter made from buckwheat and I use sorghum flour, which is great for cookie type recipes, but a bit too crumbly for bread. If you don’t have sorghum, buckwheat will work just fine!

2 eggs- beaten

1/4c psyllium flakes

2Tbsp ghee -melted

1tbsp vanilla

Whisk together these together and let sit a minute, the psyllium will soak up the liquid. Then stir in the remaining ingredients

1 cup Gf sourdough starter

3/4c sugar

2Tbsp molasses

1/2 tsp baking powder

1/2 tsp salt

Add 2c sorghum flour

Dampen your hands and scoop little balls onto a cookie sheet. Bake 350 for 20 minutes

They go so good with a cup of coffee! I imagine they’d be great with an icing too!

Want to make this sugar free??

Sub the sugar for 1/2 cup pyure or THM super sweet. Reduce the molasses to 1Tbsp. Add a dash of cinnamon to make the fall flavors pop and get the benefits of blood sugar balance 👍🏻

Gluten Free Buckwheat Sourdough

I can ask all the time if I have a recipe for gluten-free bread, or a gluten-free sourdough. And I have always had to say that I don’t. But we recently went gluten-free in my house and I just couldn’t live without bread, or dough dough for that matter! So I began playing with recipes. xanthan gum is commonly used but I find that it does make your bread gummy in texture! I don’t like a gummy bread! So in this recipe I use psyllium as a binder instead, which works beautifully and makes the bread quite lovely.

So let’s get to it!

• 1 1/2cup water

• 1/3 cup psyllium flakes

• ¼ cup avocado or coconut oil

• 3/4 cup buckwheat flour

• 1c I’ll brown rice flour

• 1 tsp salt

• 1 tsp baking powder

• 1Tbsp honey

• 1 cup gluten free sourdough starter (buckwheat or sorghum)

⁃ Set up your mixer and combine the water, honey, sourdough starter and oil and mix until combined.

⁃ Next add psyllium flakes. Once psyllium is added, let it soak for 5 minutes before proceeding.

⁃ Slowly add in the buckwheat flour, brown rice flour, baking powder, salt until well combined

⁃ Oil a bread pan or line with parchment paper and scoop the dough into the prepped pan. Cover with plastic wrap and let it sit on your counter 4-12 hours depending on your kitchen/rise time

⁃ Once risen, Bake at 350 for 50-70 minutes or until the bread is golden brown.

Baked in a round cast iron pan

⁃ Notes

⁃ This makes a single loaf in a normal loaf pan. If you want a big round sourdough loaf made in a cast iron, double the recipe!

⁃ I like to spray the top of the loaf with oil before proofing to keep it from drying out

⁃ I’ve only tried the above flours, I don’t know how gluten free mixes would work!

Baked in a loaf pan!

Lazy Sourdough

Do you ever want to make sourdough bread, but you don’t want to spend all day in the kitchen? Or you don’t have time to wait a long fermentation??

Sometimes I just don’t plan ahead long enough to wait! I developed this recipe which is heavy on the sourdough starter which allows for a shorter fermentation period.

This shows the shaggy ball of dough- and the end product, beautiful airy sourdough

It’s also super easy- and a no knead recipe!

2c sourdough starter (fed the day before preferably!)
1 c wheat flour
2 Tbsp gluten
1 tsp pink salt

Mix into a shaggy dough and let rise in a cast iron Dutch oven or covered clay baker. (Or in a loaf pan if you want! Just use foil to cover the top!) Then bake it covered at 450 x 15 min, take off the cover and decrease temp to 350 for 15-20 min

Since it’s SO much starter- it doesn’t need a long ferment. Just bake it once it’s risen- usually takes mine 2-3 hours to fully rise.

Adding additional gluten is t completely necessary. You can leave it out! But if you have it, it helps make the dough softer. You can also crush a vitamin C tablet and mix it into your bread to help the gluten get even softer.

It’s not a perfect artisan looking bread, but it works and I’m a busy mama trying to make my own bread!!

Fermented Blueberries

Fermented blueberries are an easy way to get fermented foods into my diet, and into my children’s diet. The fermentation process makes the blueberries taste a bit tart and a bit salty. Don’t be turned off by that! Try them, they are great on yogurt, granola, or just plain!

What you’re going to need is a fermenting glass weight, and lid. I got a set off Amazon made by mason tops and it works great.

You’ll also need – blueberries, salt, filtered water, widemouth jar and a kitchen scale

Begin by rinsing your blueberries

Zero your scale with a jar on it , and put it into grams
Place blueberries in the jar, and cover with about 1 inch of filtered water – place on the scale.

Now. Here’s the part where we do a little math. Take the first number on the scale. On mine, it’s 4 and multiply by 2. 4×2= 8

Remove the jar from the scale. We need to measure salt now- zero the scale with a small container.

4×2= 8

Measure 8 grams of salt and dump it into your water and blueberries. Stir it gently until all the salt is dissolved

Place your weight on top of the blueberries it’s okay if a bit of water spills out.
Place your vented lid on top and attach with a canning ring

Allow the blueberries to sit on your counter for 3-7 days. You can taste them and stop fermenting when you like them. I like 5 days.

After you have decided the ferment is completed, drain off the liquid and store in the fridge for up to a month- longer might be okay, but they never make it that long in my house!

Enjoy!

What else would you like to see from us ? Send us a message! Happy fermenting!

Sprouted Artisan Bread

I have tried on and off to become an artisan sourdough baker somewhat unsuccessfully for the past couple of years. You see, the truth is I’d love to be a purist. I have the heart of a purist. I’d love to grow my own food, get milk from a cow in my own backyard, collect eggs every afternoon, and bake my own bread. But I’m not in a season of my life that I can spend hours slaving over my meals so I have found myself to be more of a “drive through sue” right now. However I have made a commitment to my family that I will no longer be buying bread from the store. The reason I don’t wanna buy bread from the store is because I find myself buying sprouted wheat for myself and my family just doesn’t like it so I end up buying junk white bread for my family. I just don’t feel good about that. So instead I began making various sprouted wheat recipes and while I have found that my family likes this one, and it is by far the easiest I’ve made!

and that’s why I’m sharing it with you.

Next time I make this recipe I intend on taking a few more photos but for now you will have just my words to guide you, and that is enough because it really is that easy.

Start by taking 2 cups of water and warming it up, then dissolve 1 tablespoon of honey in it.

In a large batter bowl combine 3 cups of sprouted wheat flour, 1 cup of all purpose or bread flour. Add to the bowl 1 tablespoon of Active dry yeast, and 1 tablespoon of kosher salt. Whisk all the dry ingredients to combine well and then pour the warm honey water in and mix it up with a spatula. You don’t have to go crazy here just get all of the flour wet and leave it as a big shaggy mess in the bowl. Cover it up and leave it for an hour.

Let’s say you get busy and you don’t come back to it- for a couple hours, that’s fine too. I’ve mixed it up in the morning and baked it in the afternoon when I had the time. But an hour is minimum.

When you come back, preheat the oven to 425. And now you select your pan. I like to use two small greased bread pans.

But, I’ve used all of these options- 9inch pie dish, greased with oil, cast iron Dutch oven, 2 small (4.5×8.5 inch) bread pans – greased, or a stone Dutch oven.

Turn the dough bowl over and dump it into your pan, use a little bit of oil on your hands to get the dough all the way out of the bowl and into the pan. Allow the dough to puff up for about 30 minutes while your oven preheat.

Bake for 15 minutes at 475, then turn the temperature down to 375 and bake for another 15 to 20 minutes. I like to bake the dough uncovered for the first 15 minutes, and then put the lid on (or tent with foil if you don’t have a lid for your pan) for the second 15 minutes so that my crust doesn’t get too golden.

Once the dough is baked and you pull it out, I like to turn it onto a cooling rack.

I store my bread loosely wrapped in a tea towel and then inside a bread box. Our you use plastic bags, wait until the bread is fully cool so it doesn’t condensate in the bag.

Soft Everyday Bread

Trim healthy mamas can easily make this into a sprouted bread! Just use 2/3 sprouted flour and 1/3 all purpose, or all sprouted wheat!

I have been baking this bread with my toddler, the reason that’s important is because as you know toddlers don’t measure perfectly. So in short, this is a very forgiving recipe.

The ingredients are
1000 mg vitamin C tablet-crushed
2-3T honey depending on how sweet you want it (we once did 1/3c and it was so sweet and breakfast like!!)
5-6 cups flour
1T kosher salt
2 3/4 c water
2T coconut oil, melted
1 T yeast
1/4 c vital wheat gluten

First mix the water, the yeast, the gluten and 2 cups of flour until it’s welcome bind. Then let it sit and get bubbly for the yeast to develop.

Then add in the oil, honey, salt and remaining flour half a cup at a time- I usually use 2 cups of all purpose flour in total and the rest is often wheat. (I love sprouted wheat because then it’s on plan for trim healthy mamas!!) But my husband loves white bread so sometimes I do all white AP flour. Other times I do all wheat, and if you do that you’ll notice you need a bit less flour since wheat absorbs more water!

You’ll know you’ve added enough flour when the dough no longer sticks to the side of the bowl in the mixer. Once you get enough flour in the bowl knead it for about five minutes.

Then you’ll need to turn the dough out onto a surface so that you can cut it. I like to spritz my hands with a little bit of avocado oil and I also spritz my surface with avocado oil so that the sticky dough doesn’t get stuck on everything.

Divide the dough in half and place it seems I down into baking pans and allow it to rise covered for about an hour. I like to cover mine in a damp and tea towel instead of wasting plastic wrap.

Bake at 350 for 30-35 minutes then cool it on a rack! You may brush the tops with butter if you’d like really soft crusts!!

The photo is a double batch- as it is written it makes 2 loaves, not 4.

If you try this recipe out and want to give me some feedback, I welcome it!!! Happy baking mamas!!